Traditional & Proper shaving.
Today’s average male has no clue about the fine art of the traditional wet shave that their grandfathers and some of their fathers used to take part in. Instead, they’re only accustomed to the cheap and disposable shaving products that companies market. I’m not sure when or why it happened, but the tradition of passing down the secrets of a clean shave abruptly stopped. Thankfully, this glorious male ritual is making a comeback.
Benefits of the Wet Shave
Reduced costs. The cost of a double-edged safety razor blade is as little as 50 cents. You can save alot by switching over to a safety razor. Additionally, you can save money by using traditional shaving creams and soaps. Traditional shave creams and soaps are made out of natural materials & can last Years with proper use. While their up-front cost may be a bit more than shaving gels, you require less product to get a proper lather. So, you end up saving more in the long run. Safety Razors do not clog up like cartridges & are very easy to clean. You can also engrave a special message on it, think of the sentiment it will hold.
Reduce Waste. Traditional wet shaving with a double-edged safety razor uses less waste than shaving with cartridge razors. The only waste is a single metal razor blade and lather down the sink. Unlike razor cartridges, a double-edged blade can easily be recycled. The tubes and bowls that most traditional shave creams and soaps are sold in produce less waste than those clunky non-biodegradable aerosol canisters that gels come in.
Better, more consistent shaves. Most men today walk around not knowing they have horrible shaves. Electric razors and the latest 5-blade contraptions irritate the skin more than needed, leaving razor burn, ingrown hairs, and redness. Shaving with a safety razor can eliminate skin irritation and give your face a clean, healthy look.
The Tools
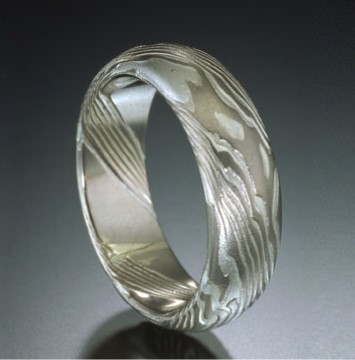
Safety Razor Switching to a double-edged safety razor is like upgrading from a Daewoo to a Mercedes. A safety razor is a machine. It’s nice holding a piece of heavy, sturdy metal in your hand while you’re shaving as opposed to a piece plastic. several companies still make them. A highly recommended safety razor is from Merkur. They have several types to choose from at varying prices. Look to spend from $40 for a new safety razor.
Blades You can choose from a variety of different blades. Each blade has a unique sharpness and cutting ability. Experiment with different kinds until you find the ones you like.
Shaving Brush If you’ve never used a brush during shaving, you’re in for a treat. A brush helps hydrate the shaving cream in order to form a thick, rich shaving lather. Using a brush to lather up helps get the shaving cream up under each whisker which results in better, smoother shaves. Plus, it just feels nice on your face to lather up with a brush. Brushes are made out of : boar, badger & synthetic. Boar bristles are stiffer than badger bristles and hold less water. Boar hair brushes are also cheaper. If you really want to have a nice shaving experience, splurge and buy a badger hair brush. Badger brushes create more lather and it feels a lot nicer on your face.
Soaps and Creams If you’re like the average guy, you’ve probably been getting your shaving cream from a can. Traditional shave creams and soaps, on the other hand, are full of natural ingredients that nourish your face and leave you smelling absolutely manly. just a dab will create enough lather for you to lather up twice.
The Technique Before putting blade to face check equipment for potential problems, loose or misaligned blades & parts, contaminants etc, be sure to have spare blades, you do not want to be caught short, especially half way through a shave, Keep the razor brush bowl warm, rinsing or sitting in warm water
Prep your beard. If you want a clean shave, you need to prep your beard adequately. The goal during beard prep is to soften your whiskers so shaving is easier and causes less irritation. The best way to soften your beard is to to shave right when you get out of the shower. The hot water from your shower should hydrate and soften your beard enough for shaving. If you haven’t showered, at least wet your beard with some hot water. A hot moist towel is a great way to soften the facial hair.
Lather up. Take your brush that you’ve pre-soaked with warm water and swirl the cream around until you get a nice thick lather. Apply the lather with your brush in swirling motions. When your face is nice and covered, take a few strokes to smooth everything out. see next page for preparation.
The shave. Unlike shaving with cartridge razors, shaving with a safety razor actually requires some skill and technique. Once mastered, though, you should be shaving effectively in no time. The four keys to a successful shave with a safety razor are: 1) use as little pressure as possible, 2) angle the blade as far away from your face as possible, 3) shave with the grain, and 4) go for beard reduction, not beard removal. This will take some getting used to if you have used cartridges your entire life.
You don’t need to use pressure because the weight of the safety razor is sufficient to cut your beard. If you press down, you’ll end up hacking up your face. To help counter the tendency to apply pressure, try holding the razor by the tip of the handle.
Angling your razor is probably the trickiest part. To get the proper razor angle, put the top of the razor head directly on your cheek, with the handle parallel with the floor. Now slowly lower the handle until the blade can cut your whisker. Practice on your arm if you’re not comfortable practicing on your face.
While shaving against the grain can get you that smooth feel, you risk slicing up your face and causing ingrown hairs. When you’re first starting out, shave with the grain of your beard. If you lather up and pass the razor more than once over your face, you’re guaranteed to get a smooth finish.
The goal with shaving should be gradual beard reduction, not beard removal in one deft swoop. Most men try to get rid of their beard in one pass of the razor. This hack-and-go technique is what causes the majority of skin irritations. If you want to avoid skin irritation, lather up and pass your razor over your face several times. This is with consideration of how long the hair is how regularly you shave, Your face will thank you.
Post-shave. Rinse your face off with some cold water to close your pores. Treat your face to a nice aftershave balm. There are several to choose from, so pick the one you like best. Aftershave lotions or gels helps reduce any irritation that may have occurred and will leave your skin looking healthy. Lotions come in a variety of types to suite skin types & personalities.
Caring for your razor: -Rinse your razor thoroughly after use to remove all soap.
-Shake your razor to remove all excess water from the head
-Please ensure you store your razor hanging on a shaving stand. Try to keep it in as dry a place as possible.
-You can also dip the whole thing in alcohol shake & let dry, this helps displaces water & sterilizes
-break down your razor for a thorough cleaning with each new blade or every few months
Blades would typically be replaced after about 6 shaves, because of safety blades low cost some change them every shave others after 12 or more, Some flip blades over to get 1 or 2 more shaves, you may even find they feel the best after their first use, Like most things depends on use, care & personal preference
Caring for your brush: –Rinse your brush thoroughly after use to remove all soap.
-Shake your brush to remove all excess water from the bristles.
-Please ensure you store your brush hanging on a shaving brush stand. If the brush if left wet, with a build up of soap, or not stored correctly, you may find the hairs breaking and coming lose from the brush.
Using Soap or cream, brush & bowl or direct on face
Soak the brush
If you have the shaving bowl, fill it with hot water -not boiling, and let the brush soak inside for a minute or two. Alternatively, you can also soak the brush with running hot water. Avoid soaking up your brush inside a sink full of water since most of the times the sink is not at its cleanest state.
- Empty the water
Once you let the brush soak in the bowl for a couple of minutes, take it out and empty of the water. You will also now need to get rid of the excess water on the brush. Shake it a couple of times until the brush stops dripping.
- Soften the shaving soap
Now it’s time to do some preparation for the hard shaving soap. Add a little bit of hot water on top of the soap, a few drops or a teaspoon maybe. This will make the soap softer. Ideally, this step is completed at the same time that the brush is soaking in hot water.
- Swirl on the soap
This is the most important step if you want to make a great lather. Take the brush and start swirling it on the soap. You will need to swirl it a few times for 10-15 seconds. Once you‘ve finished swirling the brush on top of the soap, it’s time to make the lather in the bowl.
- Swirl in the bowl Time to grab the shaving bowl. You kept a little bit of water (a few drops) already in it, right?
Grab the brush and start swirling it in the bowl. This will take you approximately a minute or a bit less. When you swirl the brush in the bowl, you will see the lather starting to build up. In the beginning, it will be bubbly but as you swirl but it will soon become thicker.
- Check if lather is ready
You would typically be creating a foam that forms soft peaks, you can start applying it evenly across your face, that’s great.
Now, there might be a chance that the lather is not exactly how you want it to be.
It might be too bubbly and you will need to continue swirling until it gets the necessary thickness.
There is also the chance that the lather is too thick and in such case it’s a good idea to pour a few drops of water and swirl once again. The key here is to add water little by little to avoid making the lather too watery.
Tip: If the lather seems to be too bubbly, continue swirling until it gets thicker. If you still can’t get the lather thick enough, go back to the soap, swirl a few times and repeat the swirling .
- Happy shaving
Once you are confident that you have a good and thick lather, it’s time to start applying it with the brush on your face until it covers all the areas you wish to shave. Just brushing your face would be enough and no extra swirling required. You ‘re good to go with the shaving.
Directly on your face – You prepared your face already right?. Using directly on face Eliminate step 5. Start swirling actions on your cheeks for the lather to build up. After 30 seconds of swirling on your wet face, you will have a nice and thick lather.
Using a cream – Eliminate step 3 &4 then Lather up. Take a small dollop (about the size of 5cent if that) of your shave cream and place it in a mug/bow. Take your brush that you’ve pre-soaked with warm water and swirl the cream around until you get a nice thick lather. Apply the lather with your brush in swirling motions. When your face is nice and covered, take a few strokes to smooth everything out. You can also do this directly on face simply spread a small dollop of cream to face & spread around. or dip brush in cream bowl & start swirling to pick up a bit of cream & then lather in bowl or on face
What’s the difference
Very little in how they shave, Hard Soap – traditional, more economic. Cream – gentler on skin more convenient & many fragrance choices
There is a lot of information on the internet about this topic, may I suggest you start at the art of manliness with this & many other topics of mens interest, AOM